You’re staring at your screen, juggling tabs full of 3D printing vendors. Each one claims to be the best. Different materials everywhere. Pricing that makes zero sense. Finishes you’ve never heard of. And you’re just trying to order one part without screwing it up.
Here’s what you’re really worried about: wasting cash on something that shows up warped, weak, or completely off-spec. The problem? You don’t even know which questions matter yet. This guide fixes that. We’ll walk through a practical system for picking the best 3D printing service, getting your files ready, comparing quotes that actually make sense, and sidestepping the traps that tank first orders.
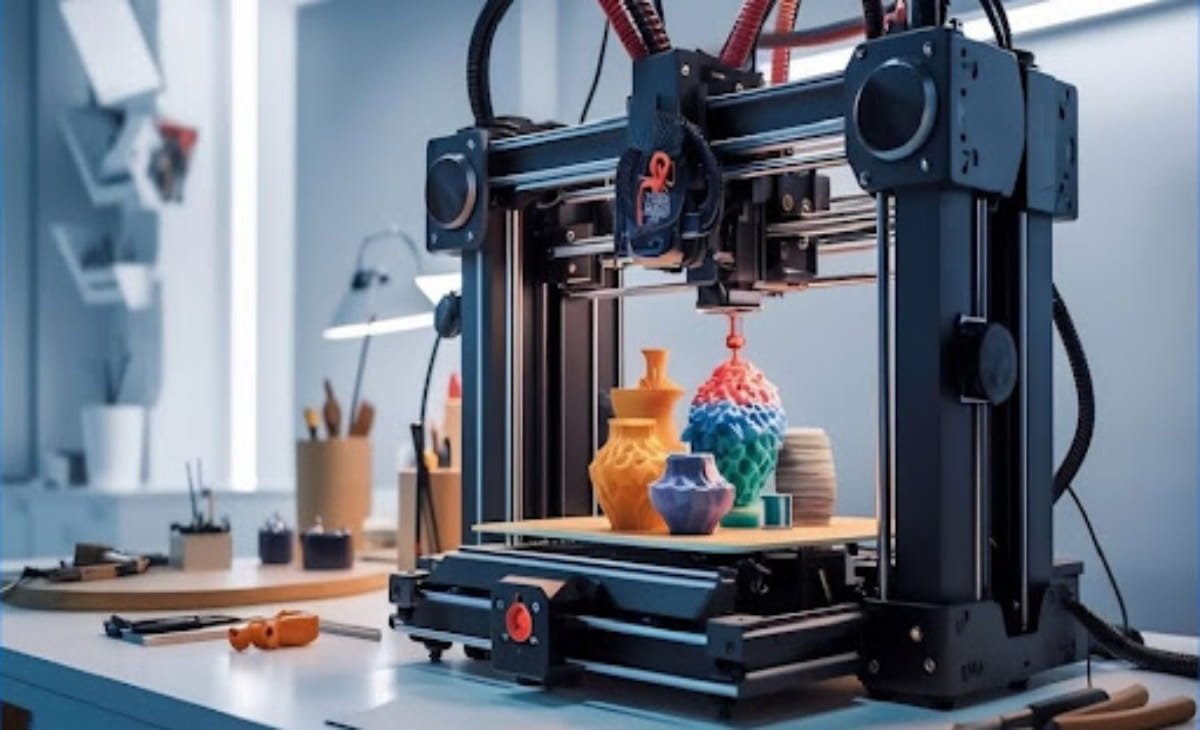
Fast-Track Checklist for Picking the Best 3D Printing Service (First Order Success)
Before you start comparing vendors or uploading anything, stop. Get clear on what you’re actually making and why it exists. This single step will save you from overpaying for features you don’t need or picking a process that can’t deliver what you want.
We’ll also dig into when hunting for a 3D printing service near me actually helps (spoiler: faster boxes at your door), how to upload STL file 3D print specs without accidentally making your bracket the size of a refrigerator, and which signals tell you a vendor is legit versus sketchy. Plus, the real workflow behind 3d printing online services is what happens after you click that order button and how your CAD file becomes a physical thing you can hold.
Match the service to your goal (prototype, functional part, miniatures, décor)
What are you building? A quick proof-of-concept? A real part that needs to survive actual use? A tiny miniature with insane detail? Something decorative for your desk? Nail this down first.
Entry-level printer demand jumped hard in 2024 shipments climbed 26% over 2023. Translation: tons of newcomers are entering this space and constantly choosing the wrong process for what they need.
If it needs to look pretty, chase smooth surfaces and fine detail. Strength doesn’t matter as much. If your part will get stressed, heated, or assembled repeatedly, durability wins over appearance every time. First orders? Aim for “good enough.” You can always improve version two after you’ve confirmed it fits and works.
Set a realistic budget (total cost = print + finishing + shipping + failures)
That quote you’re looking at? That’s not your real cost. You’ll also pay for support removal, surface finishing, custom colors, rush fees, and shipping. If this part is critical, say, a custom housing for a demo next week orders two versions in different materials or orientations. Backup plan.
Minimum fees, expedited charges, and finishing options can literally double what you thought you’d spend. Budget for a reprint if your design needs tweaking after round one.
Delivery speed vs quality trade-offs (rush production, local hubs, shipping zones)
When you filter for a 3D printing service near me, you’re trading specialty materials and advanced quality checks for speed and convenience. Local shops can turn a week-long wait into two days. That matters when you’re iterating fast or facing a deadline.
National or global services? Bigger material libraries. Tighter tolerances. Better inspection reports. But slower. If you need it yesterday, confirm whether “rush production” means they’re cutting corners on finish quality or dimensional accuracy before you pay extra.
Online 3D Printing Service Options Compared (Choose the Right Process)
This is the most important decision you’ll make. Each printing technology has completely different strengths, limits, and costs. Match it right now and avoid expensive do-overs later.
FDM for low-cost, larger parts (when layer lines are acceptable)
Fused Deposition Modeling melts plastic filament and stacks it layer by layer. Cheapest option. Best for brackets, jigs, fast prototypes, and enclosures where you can live with visible layer lines.
FDM can go big; some services hit 12+ inches per side. Catch: overhangs need supports, and peeling them off leaves marks you’ll probably sand. Design for 45-degree overhang limits and keep walls above 1.5mm or you’ll get failures.
SLA/DLP resin for fine detail and smooth surfaces (miniatures + aesthetics)
Stereolithography and Digital Light Processing cure liquid resin with UV light. Result? Incredibly smooth surfaces and tiny details perfect for miniatures, figurines, dental models, and display pieces. Features down to 0.1mm sharp.
Trade-off: brittle. Standard resins aren’t meant for mechanical loads. Parts need UV post-curing and careful resin drainage for hollow geometry. Thin bits (under 0.5mm) can snap during cleanup if supports aren’t planned right.
SLS/MJF nylon for durable, support-free geometry (functional parts)
Selective Laser Sintering and Multi Jet Fusion fuse nylon powder without needing dedicated supports. The powder itself holds the part up. You can design complex internal channels, snap-fits, and interlocking assemblies that would collapse in resin or FDM.
SLS parts feel slightly grainy and come out gray or white by default, but they’re tough. Flexible. Handle repeated flexing without breaking. Perfect for functional prototypes, living hinges, and assemblies that need real-world abuse tolerance.
Metal 3D printing (DMLS/SLM) for end-use engineering parts (when it’s worth it)
Direct Metal Laser Sintering and Selective Laser Melting create fully dense metal parts from titanium, stainless, aluminum, or Inconel. Use this when your part faces extreme heat, corrosion, or mechanical loads that polymers just can’t handle.
Expect way higher costs, longer waits (often 2–4 weeks), and strict design rules around support removal and thermal warping. Prototype in nylon or resin first to validate your geometry before committing to metal pricing.
Full-color printing (binder jet / polyjet) for figurines & marketing models
Binder jetting and polyjet can produce full-color parts by depositing colored resins or bonding agents. Great for realistic figurines, architectural models, and marketing mockups where visual punch matters more than strength.
These parts are often brittle and porous. Not suitable for load-bearing use. Expect sandstone-like or rubbery texture depending on the process. Handle them carefully.
Custom 3D Printing Online Ordering Workflow (From Upload to Delivery)
You’ve picked a process. Now you need to prep your file and configure your order without making rookie mistakes. Small errors here wrong units, mesh problems can delay production by days or get your order rejected outright.
File-ready standards before you upload (STL/STEP/3MF)
STL is most common and works fine for simple shapes, but it doesn’t preserve exact dimensions or units. STEP files keep engineering precision and work better for functional parts with tight tolerances. 3MF is newer and packages color, material, and unit data together.
Your file must be “manifold” or “watertight.” No holes, flipped normals, or intersecting shells. Most slicers flag these, but fix them in CAD before export. Always double-check that your units match what the service expects. Mixing up mm and inches can scale your part by 25.4×, turning a small bracket into furniture.
Upload STL file 3D print: quote fields that matter (and what to choose)
When you upload STL file 3D print specifications, you’ll see a menu: material, color, layer height, infill, orientation, support strategy. First orders? Choose “standard” layer height (0.1–0.2mm for resin, 0.2mm for FDM, 0.1mm for SLS). Balances quality and cost.
Infill for FDM usually defaults to 20%, which works for non-structural parts. Solid infill costs more and adds weight only when strength is critical. Orientation affects surface finish, so specify which face needs to look best and the vendor can optimize support placement.
Add-ons like sanding, vapor smoothing, dyeing, or painting can transform raw prints into polished final products. Request samples or photos first because techniques vary wildly between shops.
CAD-to-print validation (free tools + pro checks)
Before submitting, run your file through a free mesh analyzer like Meshmixer or an online STL validator. These catch non-manifold edges, thin walls, and self-intersections that cause print failures.
Many custom 3D printing providers offer a “DFM review” add-on where an engineer checks your design for printability. Typically $50–$150. If your part is complex or expensive, pay for it. Can save you a failed print and redesign cycle.
First-Time Order Playbook (Step-by-Step)
Let’s distill everything into a simple sequence for your first order. Start small, validate assumptions, scale from there.
Start with a calibration part or tolerance coupon
Order a small test piece first with a tolerance coupon with different clearance gaps, wall thicknesses, and feature sizes before committing to your full design. Validates fit, strength, and finish expectations for under $20.
Place a low-risk first order (recommended spec combos)
Choose something straightforward: an FDM PETG bracket, an SLA tough resin display part, or an SLS nylon snap-fit enclosure. Skip exotic materials, metal, or full-color processes until you’ve learned the basics of file prep and vendor communication.
Communicate requirements like a pro (order notes template)
In your order notes, list critical dimensions that must be accurate, specify which surface should look best, describe load or temperature exposure, and note any assembly or insert requirements. Clear communication prevents surprises and ensures your part comes back right the first time.
Your Questions About 3D Printing Services, Answered
Which online 3D printing service is best for functional parts vs display models?
For functional parts needing durability and complex geometry, go SLS nylon. For smooth, detailed display models, SLA resin wins. FDM works for quick prototypes where layer lines are acceptable.
Which 3D printing process requires the least post-processing for a smooth finish?
SLA resin produces the smoothest “out-of-printer” finish. SLS nylon needs no support removal but has a grainy texture. FDM always requires support cleanup and often sanding.
Are resin-printed parts safe to handle for miniatures and toys after curing?
Most resins are safe after full UV post-curing, but confirm with the vendor’s material safety datasheet. Avoid uncured resin contact wash parts thoroughly before handling.
Is “3D printing service near me” better than ordering from a national provider?
Local services offer faster shipping, easier returns, and face-to-face support. National providers may have broader capabilities, specialty materials, and more robust QA choice based on your priorities.